CHANNEL SETTINGS
Channel Settings
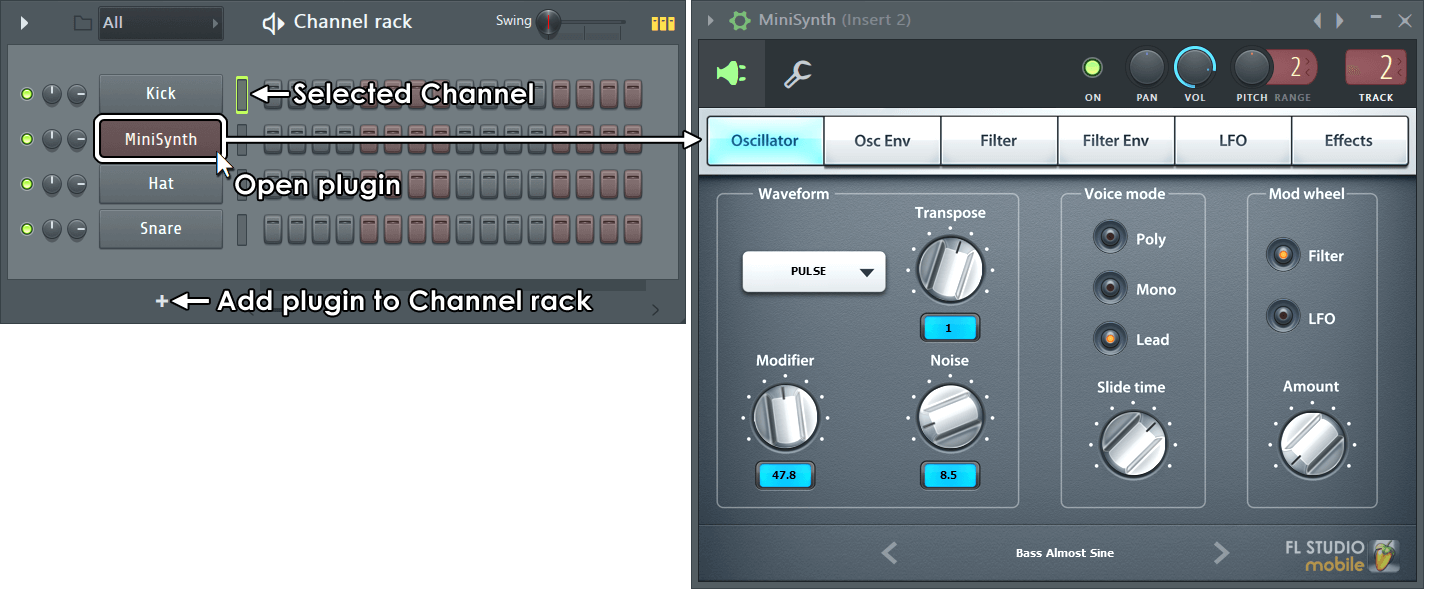
To open the plugin click the Channel button. The Channel Settings are then available from the Detailed Wrapper Settings cog icon (as shown below). These Wrapper options include Mixer track routing (TRACK), channel Pitch (tuning) and inbuilt arpeggiator functions.
Working with channels
- To open - Click the Channel button in the Channel Rack for the plugin of interest. This will open the plugin Wrapper window containing the instrument interface (if present).
- Selected channels - The Channel Selector, after each button, allows you to play one Channel while editing another, only selected Channels receive MIDI/controller input.
- Routing Instrument Channels to Mixer tracks - Drag and drop plugins on Mixer Tracks at the time of loading. See the main Routing Instrument Channels to Mixer Tracks section for more options (there are quite a few, it's worth checking out).
Settings Window & Controls
The tab-buttons that display in the Channel Settings window will depend on the instrument loaded in the Channel. Not all Channel settings and controls will work with all instrument types.
|
|
Links to Channel Settings functions:
- Main Settings
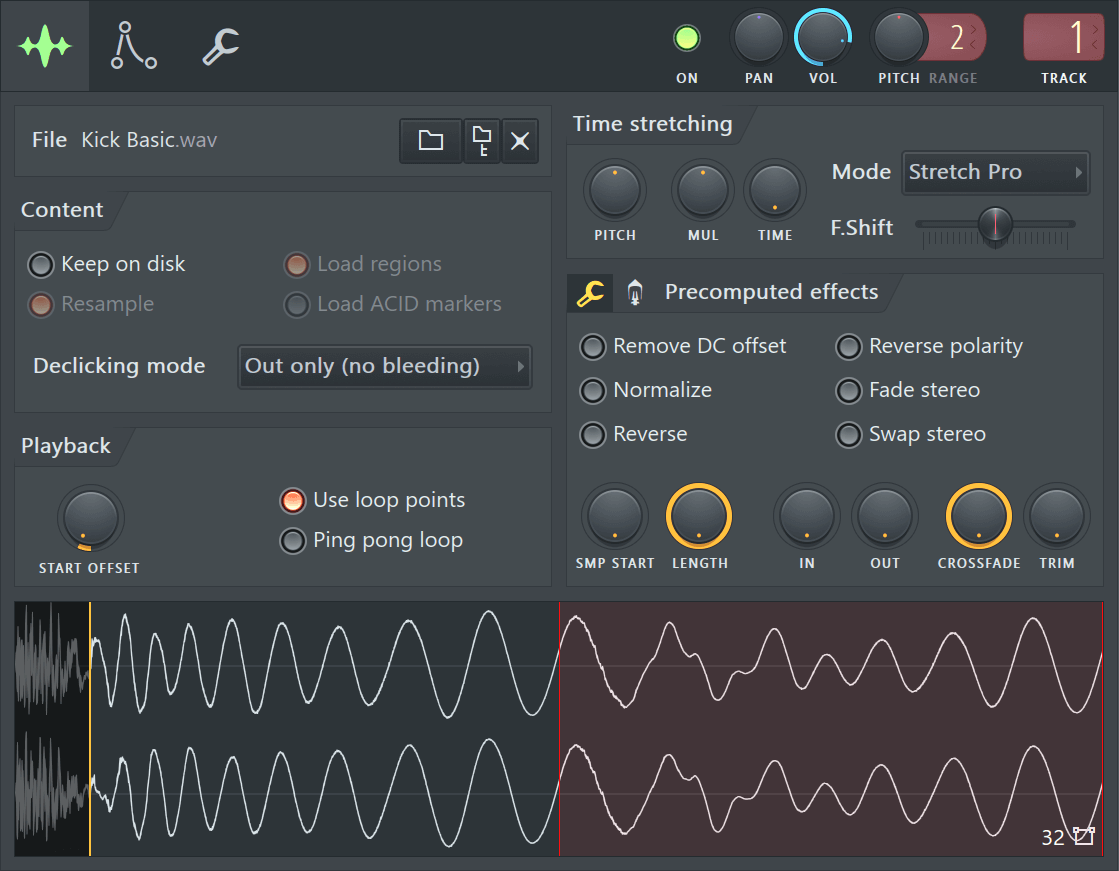
- Sampler Settings
- Envelope & Instrument Settings
- Miscellaneous Settings
- Automation Clip Settings
- Layer Settings
- Plugin Wrapper
Channel Settings Menu Commands
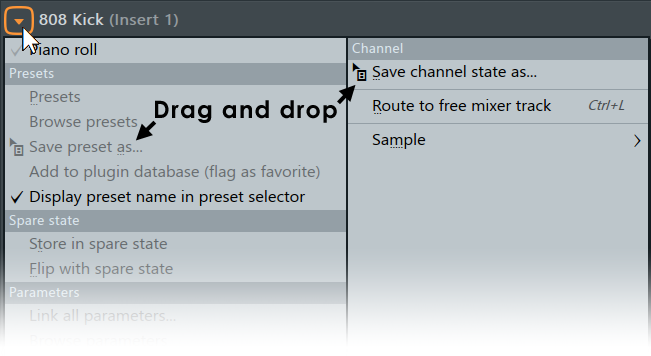
Click the down-arrow button at the top left corner of the Channel Settings window (as shown in the picture below).
Options
- Save channel state as - Allows you to save the current channel settings as a preset file. Preset is saved as a FST file. It is recommended that you save your presets in the default location FL Studio chooses, so they can be properly detected and shown in the list of available presets for the instrument.
- Route to free mixer track (Ctrl+L) - Links the channel to the first empty (without effects) FX track available. This is reflected in the FX selector in the Main Channel Settings. This command will not appear in channels that hold MIDI instrument or other instruments that do not output wave data (only wave output can be processed by effects). For more information on FX tracks, see Mixer window.
- Rename... (F2)- Select this command to rename a channel (the same can be done by Right-Clicking the title bar of the window).
- Sample - This item is only available when the loaded instrument uses samples visible to FL Studio.
- Reload - Use this command to reload samples when they were altered in external applications (wave editors, etc.), after FL Studio was started. This command appears only in channels that hold Sampler instrument.
- Save as... - Allows you to save the currently loaded sample with all precalc effects applied to it (see Sampler Channels Settings). This command appears only in channels that hold Sampler instrument.
- Edit... (E) - Opens the integrated Wave Editor with the current sample, or the custom wave editor you have selected in the Tools window.
- Detect tempo - Opens the Tempo Detection Wizard which asks you to select one of several tempo ranges the sample might be in. Select a range and the Time property of the channel will be automatically adjusted (see Sampler ). Note that the accuracy of the auto detection depends on the source material and might not always match the real sample tempo. The best practice in this case is to know in advance the real loop tempo and embed that information in the sample by using a wave editor.
- Get properties - Opens the windows properties dialog for the sample file.
- Spectrum view - Displays all waveform previews for the sample in spectrum mode, includes the Playlist. NOTE: If this is selected the Multichannel waveform view option (below) is ignored.
- Multichannel waveform view - Displays all waveform previews for the sample in stereo mode (upper left, lower right), includes the Playlist. NOTE: Spectrum view overrides this setting.